So, it has obviously been awhile, as my "Adventures in Spinsterhood" is no longer quite accurate. Regardless, I hope to pick up blogging again and make my blogs a little more helpful. That being said, after a month of being relatively sans job, Chandler and I are on a tight budget. I stepped back quite drastically at my job to relieve stress and, lo and behold, stress always comes to find me...tucked away in dark corners known as bills and relationships! Well, this led me to get a little creative and I am now attempting a go at monthly freezer cooking.
Freezer cooking 101: According to Natalie
Freezer cooking appealed to me for a couple of reasons. The main reason is it's supposed to save you a lot of money by promoting cooking at home. The second reason is it is supposed to cut down on dirty dishes, concentrating them to once a month (and, of course, plates as you go along). I'm also hoping it promotes, in our household, a little thing called portion control!
So, if you're curious, the following post will be a list of recipes and pictures to guide you toward a cheaper standard. We could all stand being cheap. Take that as you will.

Before you even start thinking, "Ooh! saving money! Let me get to the store!", freezer cooking takes a bit more preparation than that. For someone who likes to just "do" things, I found it a bit tedious. First, take a look at what you already have in your freezers and cupboards. The first step to saving money is utilizing what you already have. I do a lot of baking, so I tend to have a lot of flour, sugar and other such baking needs. I stock up on meat, especially when it's on sale, so I looked up recipes that coincided with the meats I already had on hand. Chandler helped me, so we took a basic inventory of what we had. Next, I picked the recipes. I made a list of what I needed and made a trip to the grocery store.
Now, I must say, the Safeway down the street has everything on sale because it is being renovated, but coupon shopping has done wonders for me in the past. Also, always use your club card whether you shop at Safeway, Giant or Publix. Trader Joe's has some great deals as well! Try to stick with things on sale. This will save you a lot of money and I love seeing how much I've saved on my receipt!
Alright, blah blah blah, on to the recipes!
My first choice was from this great website I found called www.moneysavingmom.com ...no, i'm not preggo.
BANANA BREAD:
Makes 2 loaves
- 4 cups flour (all-purpose, whole-wheat, or a mixture of both)
- 2 teaspoons baking soda
- 1 teaspoon baking powder
- 1 teaspoon salt
- 1 cup oil (I used melted coconut oil.)
- 2 cups sugar (I used turbinado.)
- 4 eggs, beaten
- 6-8 bananas, mashed
- 1 teaspoon vanilla
- 6 Tablespoons milk
Cool in pan for 10 minutes and then transfer to a wire rack. Cool completely.
To freeze: Slice loaf, if desired, and covered in plastic wrap, then in foil (or in a ziptop bag).
To serve: thaw on the countertop for a few hours or defrost an individual piece in the microwave for 20-45 seconds. We love to serve ours warm with butter.
Nat's notes: I ran out of regular milk that Chandler drinks and only had coconut milk. I find I'm sensitive to lactose and dairy isn't that great for you anyway. I also had just enough coconut oil to use up, so I used that alternative. Anyway, using these alternatives turned my banana bread into something QUITE delicious!

So, I started by separating my ingredients. Easier that way!
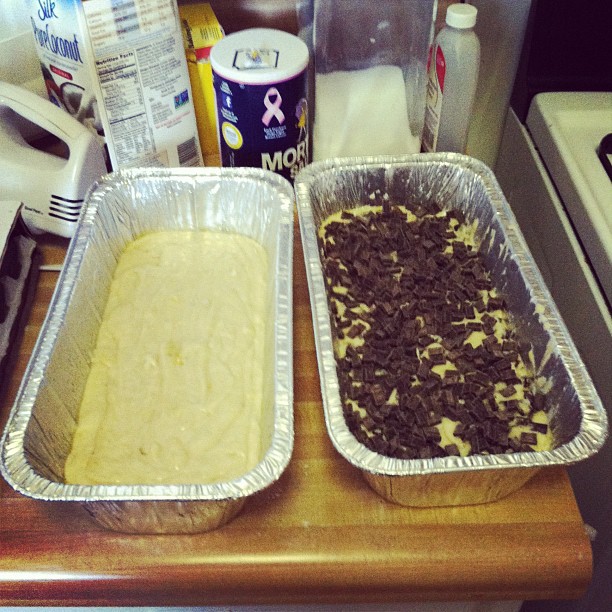
I didn't think you needed to see the process of mixing the ingredients. The recipe on that website said to add the wet ingredients to the dry, but in all my baking, I always add dry ingredients to the wet. Makes it easier to mix. Less dry ingredients flying all over the place. Also, I had an open bag of chocolate bits, so I not only sprinkled it on top, I added it to the batter. SO good.

Post baking. I let it completely cool, sliced it so we can eat individual pieces and then wrapped it in cling wrap and foil.
Tah dah! First step in freezer cooking! It was super easy and I feel great that we have so much food for breakfast or a snack already!
Now, every meal we eat, we mark down to keep track of how sufficient this is actually going to be. A little blurry, but here's what I mean. Today, we ate two slices of banana bread, two lunch burritos and two hot pockets each (they're relatively smaller).

My next recipe will be continued in a follow-up blog!
No comments:
Post a Comment