Thursday, May 31, 2012

Freezer Cooking: Cookie Dough

At this next point in my freezer cooking experience, I was running out of room in my freezer. I still have ingredients on hand to make breakfast ham and cheese pockets, but I'm going to have to wait until we eat some of our goods. I might make those next week. Well, with all of these casseroles and pizza pockets and burritos and banana bread, I want to make something sweet, just in case we wanted a dessert. The eggs I had on hand were also about to pass their "best by" date, so I wanted to use those up as soon as possible.

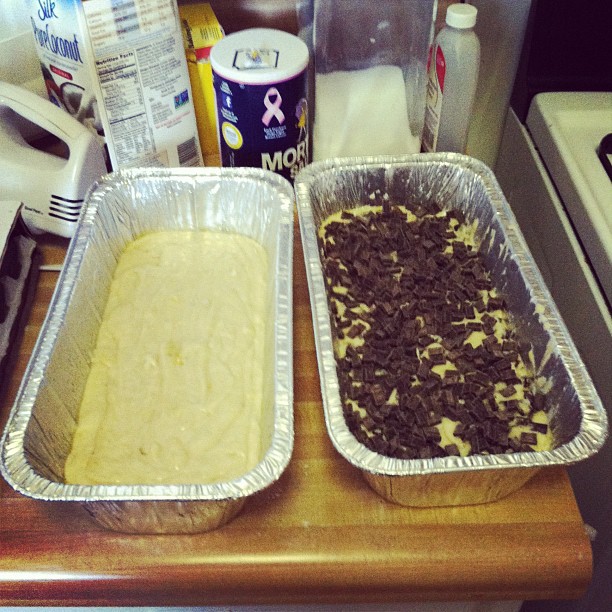
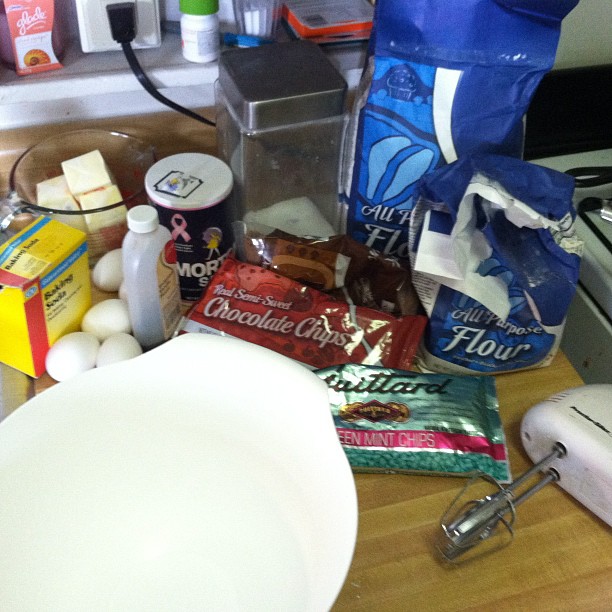
Needless to say, we ended up with two batches of cookie dough. Simple and I had some chocolate chips on hand. You might remember I mentioned in my first post I bake a lot. So, I pretty much had everything I needed for this on hand and was able to use up goods I had in my pantry. My pantry before I started was brimming with unused pasta, flour, brown sugar, chocolate chips, etc. Now, I actually have a bit more room. It feels really great to utilize instead of waste.

Now, for the cookie dough recipe, any standard will do. I used two different variations, but you'll usually end up with your standard cookie dough. I'll post a recipe underneath, but your basic recipe on the back of the bag will work just fine.


NESTLE'S COOKIE DOUGH:
  • 2 1/4 cups all-purpose flour
  • 1 teaspoon baking soda
  • 1 teaspoon salt
  • 1 cup (2 sticks) butter, softened
  • 3/4 cup granulated sugar
  • 3/4 cup packed brown sugar
  • 1 teaspoon vanilla extract
  • 2 large eggs
  • 2 cups (12-oz. pkg.) 
  • 1 cup chopped nuts (optional)

Directions

PREHEAT oven to 375° F.

COMBINE flour, baking soda and salt in small bowl. Beat butter, granulated sugar, brown sugar and vanilla extract in large mixer bowl until creamy. Add eggs, one at a time, beating well after each addition. Gradually beat in flour mixture. Stir in morsels and nuts. Drop by rounded tablespoon onto ungreased baking sheets.

BAKE for 9 to 11 minutes or until golden brown. Cool on baking sheets for 2 minutes; remove to wire racks to cool completely.

PAN COOKIE VARIATION: Grease 15 x 10-inch jelly-roll pan. Prepare dough as above. Spread into prepared pan. Bake for 20 to 25 minutes or until golden brown. Cool in pan on wire rack. Makes 4 dozen bars.

SLICE AND BAKE COOKIE VARIATION:
PREPARE
dough as above. Divide in half; wrap in waxed paper. Refrigerate for 1 hour or until firm. Shape each half into 15-inch log; wrap in wax paper. Refrigerate for 30 minutes.* Preheat oven to 375° F. Cut into 1/2-inch-thick slices; place on ungreased baking sheets. Bake for 8 to 10 minutes or until golden brown. Cool on baking sheets for 2 minutes; remove to wire racks to cool completely. Makes about 5 dozen cookies.

* May be stored in refrigerator for up to 1 week or in freezer for up to 8 weeks.
I'll post pictures below, but mixing is very standard.

 Ingredients.

Butter first.

Next, your sugars.

Eggs and such.


Start adding the flour.


I did a batch of chocolate chip and a batch of mint. MMM!

Lastly, if you've never stored frozen cookie dough before, it's very easy. This is how I like to do it. List the date you made it, what kind it is, what temperature to cook it and for how long. Remember, those with gas stoves need to adjust their temperature and time a bit.

The second part is to push the cookie dough to the bottom of the bag as much as possible. I picked up this technique when mixing butter with herbs and refreezing it. I used the butter to stuff under the skin of my turkey for Thanksgiving and this should work relatively the same way. You push to the bottom, forming a tube with your hand. You can see some of my cookie dough smeared. Now, you have a nice tube of cookies in the freezer for when you're ready to bake them! Just slice them into "coins", pop them on your baking sheet and stick them in the oven! The other really wonderful thing? Each batch made 3 bags of cookies!

Nat's notes: I have found from personal experience, the fluffier cookies come from cold dough and the flat, moist ones come from a warmer dough. So, if I were baking these, I'd probably thaw them in the fridge first, but if I wanted a softer cookie, I might sit them out on the counter to become a bit closer to room temperature. There is egg in there, so don't let it sit out for TOO long :)

Freezer Cooking: Pizza Casserole

We obviously like pizza in this household and by obviously, I mean Chandler loves pizza. I could live without it, but I tried to make some things I knew he would like. I came across a recipe I had found awhile back on www.cullyskitchen.com and decided to try it out as a freezer recipe. Instead of baking it right away, however, I cooked some ingredients and then just layered it, like you would find a pizza in the frozen food section of your local grocery. Warning: This recipe is rather meat and cheese heavy. Almost a little too much for me, but he will like it.

Anyway, with this recipe, I really did do a step-by-step picture progression. I hope it helps!


3 MEAT PIZZA CASSEROLE:

Ingredients
1 lb bow tie pasta
1 lb mild pork sausage
1 large onion, medium size chopped
2 (26 ounce) jars spaghetti sauce (I used Bertolli’s Mushroom and Garlic)
1 lb cubed cooked ham
1/2-1 lb of sliced pepperoni
3 (8 ounce) bags of shredded mozzarella cheese
6 tablespoons of grated parmesan cheese
2 tablespoons chopped garlic
1 teaspoon dried oregano

Directions
1. Cook pasta in boiling water until al dent é.
2. Cook sausage, garlic powder and oregano with onions until the juices run clear.
3. In a lightly greased 9x13x3 inch pan, pour a small amount of sauce to lightly coat bottom.
4. Layer ingredients in the order listed below.
5. 1st layer-1/3 of the pasta, 1/3 remaining sauce, 1 bag of mozzarella cheese, 2 Tablespoons parmesan cheese, sausage and onions.
6. 2nd layer-1/2 of the remaining pasta, 1/2 remaining sauce, 1 bag of mozzarella cheese, 2 Tablespoons parmesan cheese, ham.
7. 3rd layer-all remaining pasta, all remaining sauce, 1 bag of mozzarella cheese, 2 Tablespoons parmesan cheese, all the pepperoni(completely covering the entire top with pepperoni).
8. Bake at 375°F for 40 minutes.
9. Let sit for 5 minutes before serving.
3. In a lightly greased 9x13x3 inch pan, pour a small amount of sauce to lightly coat bottom.

 Prep time!

 While the pasta is cooking, it's time to cook your sausage. Here we have a sausage roll, as well as left over sausage links I had, onions and garlic.

Let's mix it up! Delicious! Note: I started with my cast iron skillet and ended up switching to my wok to have more room.

While that was cooking up in my cast iron skillet, I diced up pieces of ham.


Here starts the layering process. You might have to adjust if you plan to use to pans. It originally calls for one.


Here I drained my pasta. There's bow tie pasta, but I had some quinoa in my cabinet as well, so I added that to the mix.


Pasta.

More sauce.

Mozzarella and Parmesan.

All of the sausage.

More pasta.


Ham layered. There was leftovers, so the dogs were happy.

I got tired of the rest of the layering pictures, but you get the idea.

Cover and Label!

Sorry for the excessive pictures, everyone! Let me know if you have any questions!

Wednesday, May 30, 2012

Freezer Cooking: Pizza Pockets

Part Five: The Pizza Pocket.

I have to give a bit of a disclaimer up front. These were not as delicious as I would have liked them to be. However, I tend to have a stronger palate. What can I say? My mother started me off young with black beans and rice instead of baby food. So, if you're reading any recipes and I say I actually like them, keep in mind I do enjoy things rich in flavor and preferably with a lot of spice. If you're like Chandler, on the other hand (and by that, I mean completely white bread, no crust...ya know what I'm saying?)...if you like things a bit bland or like your spices on the mild side, this might be for you.

That being said, I'm posting this because:

1. Well, I made it, by golly! And it's in the freezer. And isn't that why I'm posting? So, you can learn from my mistakes...em, triumphs?

2. I'll just add some spices next time...a bit of oregano, pepper, etc.


Also, I must note this was my first go at making homemade dough. Also, again, I got the recipe at www.moneysavingmom.com. So here we are...


PIZZA POCKETS:

Dough:
  • 2 Tablespoons active dry yeast
  • 2 cups warm water (105 to 115 degrees F.)
  • 2 teaspoons sugar
  • 2 teaspoons salt
  • 4 Tablespoons oil (I used olive oil.)
  • 5 cups flour
Filling:
  • 1 pound ground beef
  • 1/2 cup chopped onion
  • 1 1/2 cup pasta sauce or pizza sauce
  • 2-3 cups shredded cheese (I used mozzarella, but I think cheddar or a mixture of cheese would work well, too.)
  • Other optional filling ingredients: diced black olives, pepperoni, diced green pepper, and/or diced mushrooms
To make dough: Mix yeast into warm water until dissolved. Add sugar, salt, oil, and flour. Mix well and dump onto a floured surface and knead for 3-5 minutes.
To make filling (I browned this while mixing up the dough): Brown ground beef with onion (and green pepper, if desired). Drain. Add pasta sauce and mix together. Add other optional filling ingredients, if desired.
To make Pizza Pockets: Divide dough into 15-20 pieces. Roll pieces into balls. Flatten balls into circles with rolling pin. Dollop a few tablespoons of filling onto dough circle and sprinkle with cheese. Fold over and seal tightly.
Bake on a greased cookie sheet at 500 degrees for 10-15 minutes until browned.
To freeze: Cool completely and store in an airtight ziptop freezer bag for up to 2-3 months.
To serve: Remove desired number of pizza pockets from the freezer and warm them individually in the microwave for about two minutes or until heated throw. Or, warm on a cookie sheet in a 350-degrees oven for 20 minutes, or until heated through.


First step: Prep


I first made the dough. This is a reasonable progression, as you need pockets to fill.

Next, I broke them up into pieces. My dough made about 18 pieces.


I then rolled the bits into balls and rolled them flat with a rolling pin.

The following step was mixing the filler.

Here is where I should have added some spices. Next time.

Add your filler and toppings...

Fold and pinch sides together...

Result: Pizza Pocket!


Nat's Notes: If you're cooking with a gas stove, it's always tricky trying to figure out how long to cook something. As you can see above, I didn't adjust my cook time or temperature, so they turned out a bit dark. With a gas stove, I'd often recommend adjusting your temperature to about 25 degrees less and you may still have to adjust cook time. I always go for the lowest time given. Example: If it says bake at 350 for 35-45 minutes, I'll often bake at 325 for 35 minutes, but may check the meal around 30 minutes.

Freezer Cooking: Chicken Casserole

This next part was a big step in the freezer cooking process and one I'm still skeptical on.  I won't believe it'll turn out tasty until I recook it and see. This was my first attempt at making a casserole. (For freezer cooking. Not ever.) Again, as I've stated before, I was looking to utilize chicken I already had before it went bad. So, I decided on a casserole called...

CHICKEN & CHEESE NOODLE BAKE:

(I got this recipe off of www.tasteofhome.com)


Ingredients

  • 1 package (16 ounces) spaghetti, broken
  • 2 medium onions, chopped
  • 1 medium green pepper, chopped
  • 1 medium sweet red pepper, chopped
  • 1/2 cup butter, cubed
  • 6 tablespoons all-purpose flour
  • 2 cups 2% milk
  • 4 cups cubed cooked chicken
  • 1 can (10-3/4 ounces) condensed cream of chicken and mushroom soup, undiluted
  • 1 can (10-3/4 ounces) condensed cream of mushroom soup, undiluted
  • 1 cup (8 ounces) sour cream
  • 1/2 teaspoon celery salt
  • 1/2 teaspoon pepper
  • 2 cups (8 ounces) shredded part-skim mozzarella cheese
  • 1 cup (4 ounces) shredded cheddar cheese

Directions


  • Cook spaghetti according to package directions. Meanwhile, in a Dutch oven, saute the onions and red peppers in butter until tender. Stir in flour until blended; gradually add milk. Bring to a boil; cook and stir for 2 minutes or until thickened. Stir in the chicken, soups, sour cream, celery salt and pepper.
  • Drain spaghetti; add to sauce mixture and toss to coat. Transfer to two greased 11-in. x 7-in. baking dishes. Sprinkle with cheeses. Cover and freeze one casserole for up to 3 months. Cover and bake the remaining casserole at 350° for 20 minutes. Uncover and bake 5-10 minutes longer or until bubbly.
To use frozen casserole: Thaw in the refrigerator overnight. Remove from the refrigerator 30 minutes before baking. Cover and bake at 350° for 40 minutes. Uncover and bake 5-10 minutes longer or until bubbly. Yield: 2 casseroles (6 servings each).  


First, start with all of your ingredients at hand.


  Luckily, my dad bought me a Dutch Oven last year as a gift. It really is important to have enough room to cook in your pot, pan, etc.


Next step, add flour to start to thicken it up.


And then milk to make a thick base.


Lastly, mix in the spaghetti (I had a mix of left over whole wheat and bleached, so I used it all up). Layer with your cheese mix, cover and store.


I didn't take a last picture, but after covering the casserole, make sure to list a date, temperature and cook time. Also, label what it is or you might end up baking the wrong casserole for dinner, if you make more than one kind. I portioned my casseroles, so we don't eat too much. Although, looking at these, they STILL seem like too much casserole. I'll send it to work with Chandler.


Stay tuned!

Freezer Cooking: Marinades

The next step in my freezer cooking process was something quite simple. Marinades. The thing that often stops me from wanting to cook anything is the prep. Don't get me wrong. I love to cook. But, when I've been running around all day or have been at work, sometimes I just don't feel like standing in the kitchen for an hour or more. This led me to preparing marinades to stick in a bag with meat and throw in the freezer.

My first step in marinating was looking for something on hand and simple for half a pork loin I had in the freezer. I found one at www.busy-at-home.com and it was made up of mostly things I had in my fridge.


MAPLE GLAZED PORK LOIN MARINADE:

  • 1 (3 lb)  boneless pork loin
  • 1 teaspoon ground ginger
  • 1/4 cup orange juice
  • 1/2 cup barbecue sauce
  • 1/4 cup maple syrup (I just used our pancake syrup.)
  • 1 teaspoon grated orange rind
Mix all the marinade ingredients and pour over pork loin.  Bake at 375° for 1 to 1 1/2 hours or in crockpot set to low for 6 to 8 hours.

To freeze: Place the loin in a zip-top freezer bag and pour marinade over the top.  Seal the bag, being careful to push out as much air as possible.  Freeze.

To cook from frozen: Empty contents of bag into crockpot.  Set temperature to low and bake 8-10 hours.


Beyond a prep photo, I didn't really think anyone needed a step by step for mixing a marinade. Mix and pour into a bag. Freeze. I will post the chicken marinade below. I'm sure you can find a better one than this, but it came from everything I already had on hand.


CHICKEN MARINADE:

This one came from www.cooks.com  

1/2 C oil
1 C Vinegar
1 1/2 tsp poultry seasoning
2 tbsp. salt
1/4 tsp pepper
1 egg
paprika

Mix together all ingredients. Add chicken. Refrigerate for several hours.

Nat's notes: I am a little skeptical about this marinade. It seems relatively simple, however I'm not sure I'll be thrilled with all the vinegar. I will let you know how it is once we eat it. Anyway, again you can pour in a bag and freeze.

Enjoy!

Oh, and to be continued...

Tuesday, May 29, 2012

Freezer Cooking: Burritos

Alright, the second part of my freezer cooking day was spent making lunch burritos. Anything easy to grab and pop in the microwave is a plus in my book. In my opinion, if it's difficult to get to (even the process of making a healthy salad for lunch) then you're more likely to run out and grab something like McDonald's or Wendy's or any other quick unhealthy fast-food. And let us be honest with ourselves...if we run to McDonald's for an easy meal, even if a salad is a possibility, we're not getting a salad, now are we?

So, burritos. Not the healthiest lunch, but these are rather portioned and smaller. Grab a piece of fruit with it and lunch isn't so bad.

Again, I got this recipe from www.moneysavingmom.com and it was relatively tasty and really easy to make!

LUNCH BURRITOS:

Makes 20 burritos
  • 2 pounds ground beef
  • 2 cans refried beans
  • 2 cans enchilada sauce
  • 1/2 cup water
  • 1/3 cup diced onion (you can also use dried or minced onion)
  • 1 taco seasoning packet
  • 1 teaspoon dried oregano
  • 3 cups shredded cheddar cheese
  • 20 burrito-sized flour tortillas
Brown ground beef with onions. Drain and add all remaining ingredients except tortillas (and cheese, if you want to sprinkle the cheese on instead).

Bring mixture to a boil. Reduce heat, cover, and simmer for 20-30 minutes.
Spoon 1/4-cup of the meat mixture onto a tortilla, sprinkle with cheese (if you didn’t melt cheese into the mixture when you simmered it). Fold sides in and roll up tightly.

To freeze: Wrap each burrito in a paper towel and then in a foil square. Put burritos in two airtight ziptop freezer bags and store in the freezer for 2-3 months.

To serve: Pull out desired number of burritos. Remove foil  and heat a single burrito in the microwave for about a minute or leave the foil on and heat one or more burritos in a preheated 350-degree oven for 30 minutes or until heated through.

These can be eaten plain or served with lettuce, cheese, salsa, and/or sour cream.


 Again, I started by separating all of my ingredients. I had left over cheese (some cheddar and some four cheese Mexican mix), so I made sure to to use that up. This is where I also had ground turkey in my freezer, so I used that instead of ground beef. I only had 1.3 lbs of ground turkey, but it turned out fine.


 See? Yum!


 Recommendation: Use a bigger pan. This was the biggest frying pan I had, but it was near to overflowing. Next time, I might use my wok. However, be careful with wok cooking as it heats up rather quickly and you don't want your food to burn. When simmering, the bottom of the meat did burn a bit, so don't overheat. It was still delicious.


 Next step: 1/4 C of mix and sprinkle with cheese. I used extra cheese, but if you don't have it on hand, just portion. Don't overfill the burrito tortilla. It makes it easier to wrap.


 I wrapped each burrito in a paper towel and then in foil. I placed 6 in a freezer bag and labeled with the name and date. They can supposedly last for 2-3 months, though I think they won't last us that long. If baking in the oven, make sure to remove the paper towel! If in the microwave, take off the foil!


Alright, kiddos. To be continued...

Adventures in Frugalhood: An ex-spinsters guide to saving money and freezer cooking.

Okay...

So, it has obviously been awhile, as my "Adventures in Spinsterhood" is no longer quite accurate. Regardless, I hope to pick up blogging again and make my blogs a little more helpful. That being said, after a month of being relatively sans job, Chandler and I are on a tight budget. I stepped back quite drastically at my job to relieve stress and, lo and behold, stress always comes to find me...tucked away in dark corners known as bills and relationships! Well, this led me to get a little creative and I am now attempting a go at monthly freezer cooking.

Freezer cooking 101: According to Natalie

Freezer cooking appealed to me for a couple of reasons. The main reason is it's supposed to save you a lot of money by promoting cooking at home. The second reason is it is supposed to cut down on dirty dishes, concentrating them to once a month (and, of course, plates as you go along). I'm also hoping it promotes, in our household, a little thing called portion control!

So, if you're curious, the following post will be a list of recipes and pictures to guide you toward a cheaper standard. We could all stand being cheap. Take that as you will.


Before you even start thinking, "Ooh! saving money! Let me get to the store!", freezer cooking takes a bit more preparation than that. For someone who likes to just "do" things, I found it a bit tedious. First, take a look at what you already have in your freezers and cupboards. The first step to saving money is utilizing what you already have. I do a lot of baking, so I tend to have a lot of flour, sugar and other such baking needs. I stock up on meat, especially when it's on sale, so I looked up recipes that coincided with the meats I already had on hand. Chandler helped me, so we took a basic inventory of what we had. Next, I picked the recipes. I made a list of what I needed and made a trip to the grocery store.

Now, I must say, the Safeway down the street has everything on sale because it is being renovated, but coupon shopping has done wonders for me in the past. Also, always use your club card whether you shop at Safeway, Giant or Publix. Trader Joe's has some great deals as well! Try to stick with things on sale. This will save you a lot of money and I love seeing how much I've saved on my receipt!


Alright, blah blah blah, on to the recipes!

My first choice was from this great website I found called www.moneysavingmom.com ...no, i'm not preggo.

BANANA BREAD:


Makes 2 loaves
  • 4 cups flour (all-purpose, whole-wheat, or a mixture of both)
  • 2 teaspoons baking soda
  • 1 teaspoon baking powder
  • 1 teaspoon salt
  • 1 cup oil (I used melted coconut oil.)
  • 2 cups sugar (I used turbinado.)
  • 4 eggs, beaten
  • 6-8 bananas, mashed
  • 1 teaspoon vanilla
  • 6 Tablespoons milk
Stir together dry ingredients. Beat together remaining ingredients. Add wet ingredients to dry ingredients and blend until just combined. Pour into greased loaf pans and bake at 350 degrees for 1 hour and 15 minutes or until toothpick inserted into the bread comes out clean.
Cool in pan for 10 minutes and then transfer to a wire rack. Cool completely.
To freeze: Slice loaf, if desired, and covered in plastic wrap, then in foil (or in a ziptop bag).
To serve: thaw on the countertop for a few hours or defrost an individual piece in the microwave for 20-45 seconds. We love to serve ours warm with butter.


Nat's notes: I ran out of regular milk that Chandler drinks and only had coconut milk. I find I'm sensitive to lactose and dairy isn't that great for you anyway. I also had just enough coconut oil to use up, so I used that alternative.  Anyway, using these alternatives turned my banana bread into something QUITE delicious!


So, I started by separating my ingredients. Easier that way!


I didn't think you needed to see the process of mixing the ingredients. The recipe on that website said to add the wet ingredients to the dry, but in all my baking, I always add dry ingredients to the wet. Makes it easier to mix. Less dry ingredients flying all over the place. Also, I had an open bag of chocolate bits, so I not only sprinkled it on top, I added it to the batter. SO good.


Post baking. I let it completely cool, sliced it so we can eat individual pieces and then wrapped it in cling wrap and foil.


Tah dah! First step in freezer cooking! It was super easy and I feel great that we have so much food for breakfast or a snack already!

Now, every meal we eat, we mark down to keep track of how sufficient this is actually going to be. A little blurry, but here's what I mean. Today, we ate two slices of banana bread, two lunch burritos and two hot pockets each (they're relatively smaller).


My next recipe will be continued in a follow-up blog!